SwiftUI 自定議溫度計控件
Xcode 14.0, swift 5.7, iOS 16.0
2022-09-14
雖然SwiftUI也提供了很多內建的控件,也可以把UIKit的控件包裝成SwiftUI控件,但有時候不是不夠用,這次以一個溫度計控件來展示如何在SwiftUI做自定議的控件。
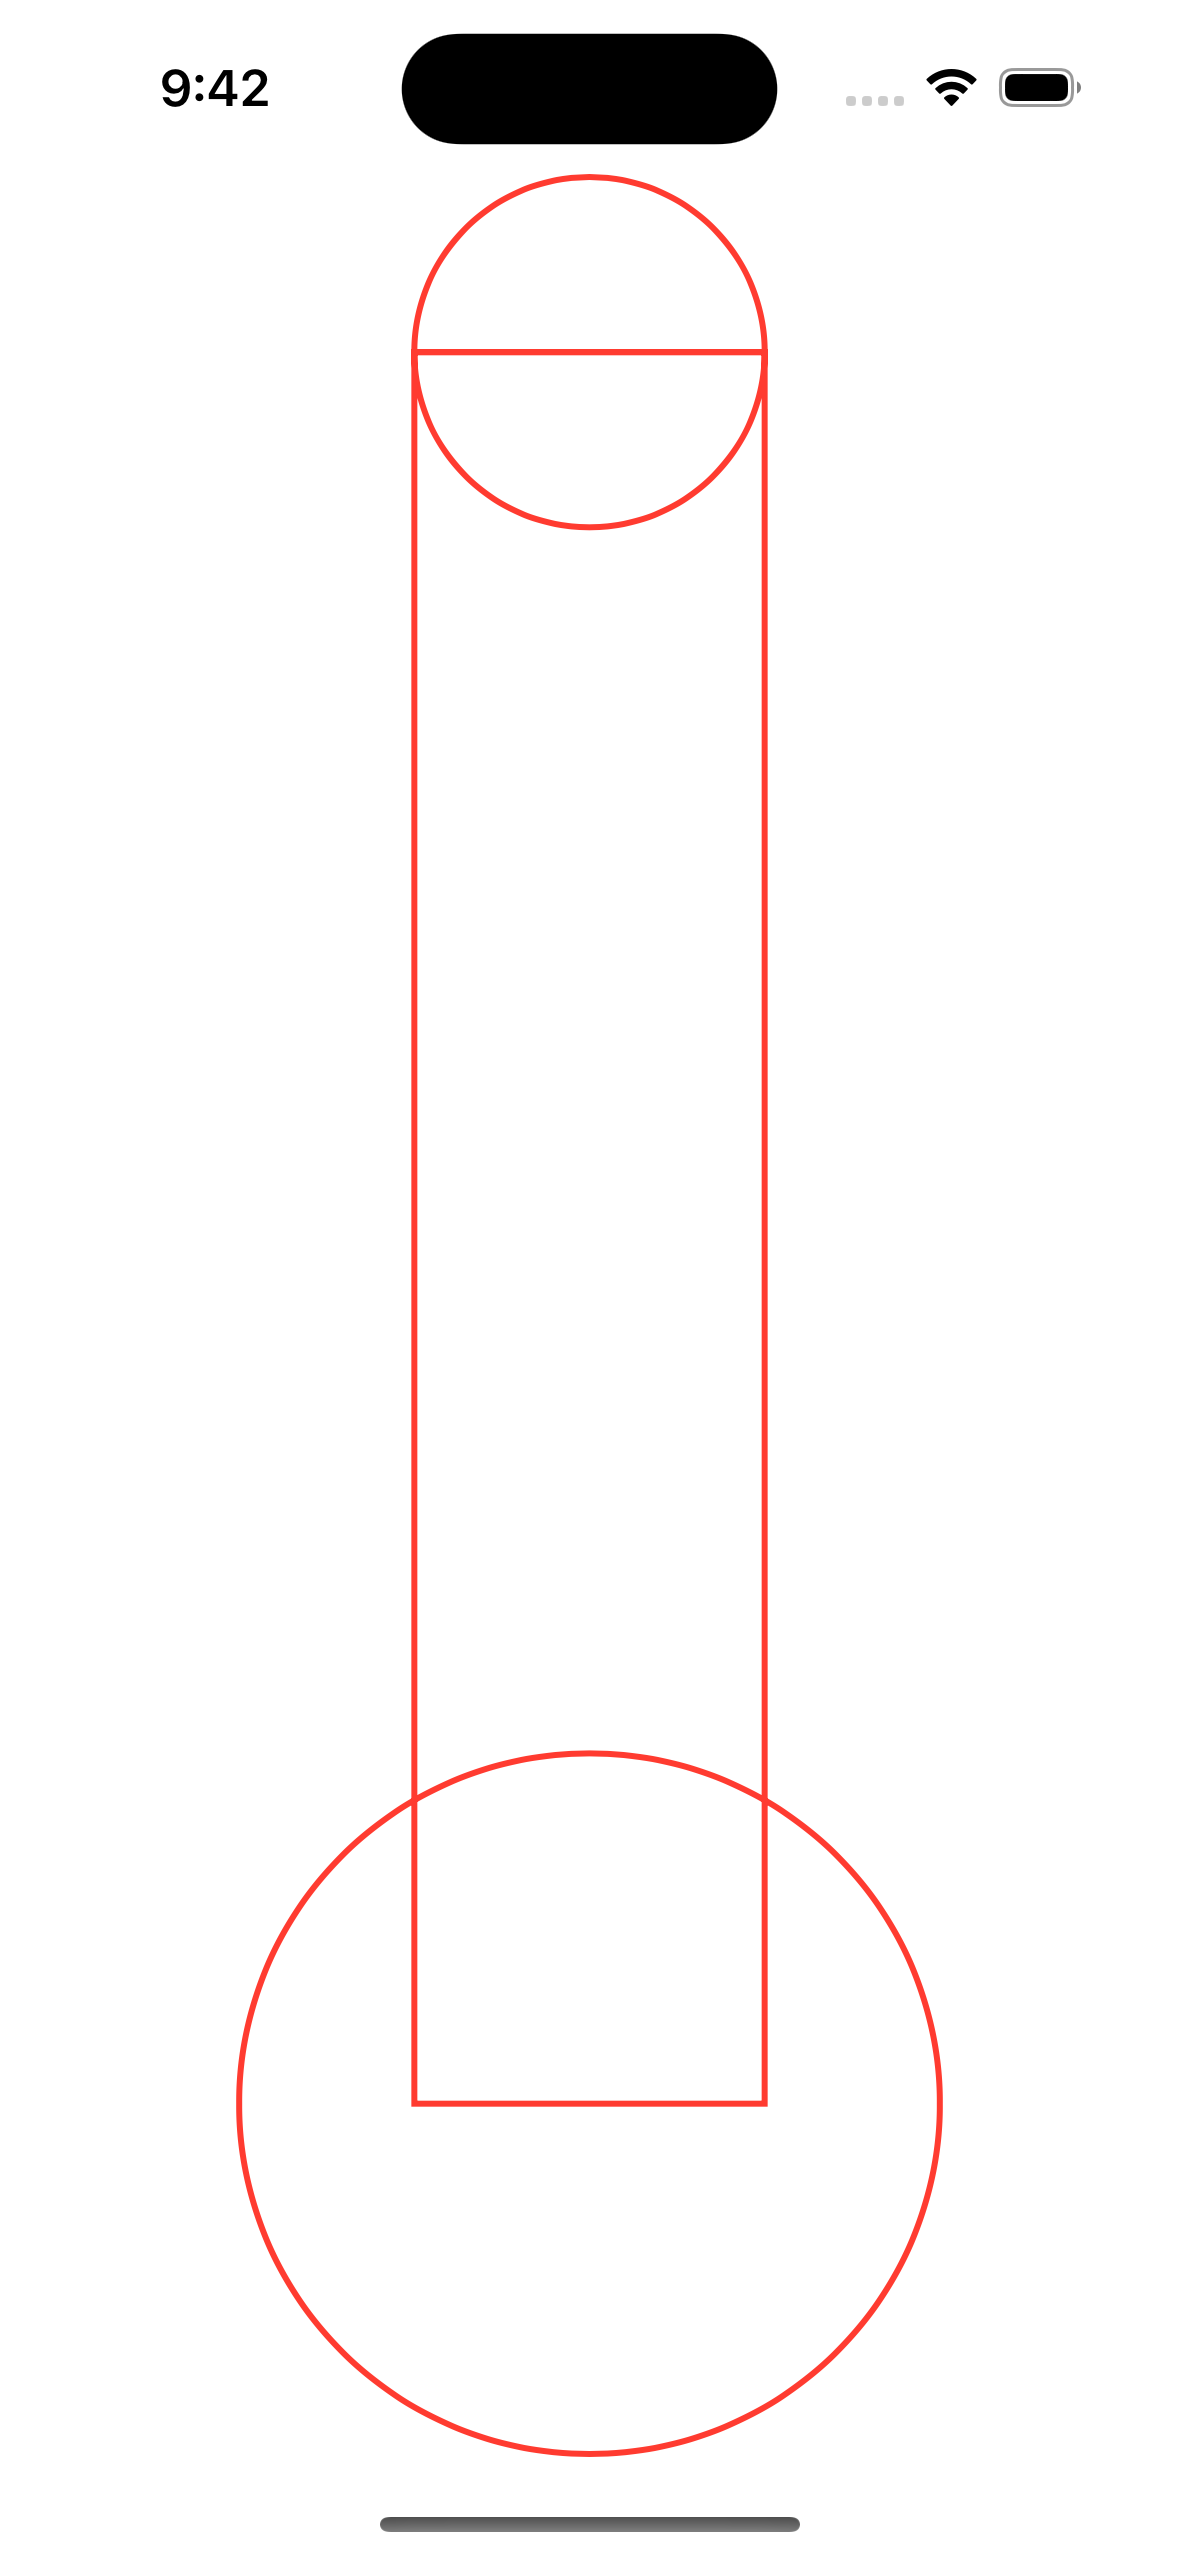
1. 先畫一個溫度計的外框,由一個大圓,一個小圓和一個長方形疊加在一起。
import SwiftUI
struct ThermometerShape : InsettableShape {
var insetAmount: CGFloat = 0
func path(in rect: CGRect) -> Path {
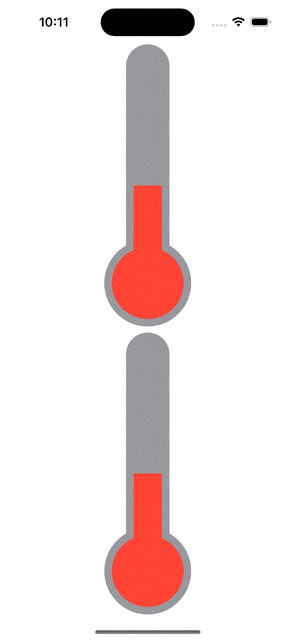
let radius = min(2.0*rect.height/13.0, rect.width/2.0)
let centerX = rect.width / 2.0
let centerY = rect.height / 2.0 + 3.0 * radius + 1.0 * radius / 4.0 - radius
let center = CGPoint(x : centerX, y : centerY)
let originalX = center.x - 1.0 * radius / 2.0 + insetAmount
let originalY = center.y - 5 * radius
let origin = CGPoint(x : originalX, y : originalY)
let rectWidth = radius - 2.0 * insetAmount
let rectHeight = 5 * radius
let rectSize = CGSize(width: rectWidth, height: rectHeight)
let halfCircleRadius = 1.0 * rectWidth / 2.0
let halfCircleCenterX = originalX + halfCircleRadius
let halfCircleCenterY = originalY
let halfCircleCenter = CGPoint(x : halfCircleCenterX, y : halfCircleCenterY)
return Path { path in
path.addArc(center: center, radius: radius - insetAmount, startAngle: .degrees(0.0), endAngle: .degrees(360), clockwise: false)
path.addRect(CGRect(origin: origin, size: rectSize))
path.addArc(center: halfCircleCenter, radius: halfCircleRadius, startAngle: .degrees(0.0), endAngle: .degrees(360.0), clockwise: false)
}
}
func inset(by amount: CGFloat) -> some InsettableShape {
var shape = self
shape.insetAmount += amount
return shape
}
}
struct ThermometerView : View {
var body: some View {
ThermometerShape().stroke(.red, lineWidth: 2)
}
}
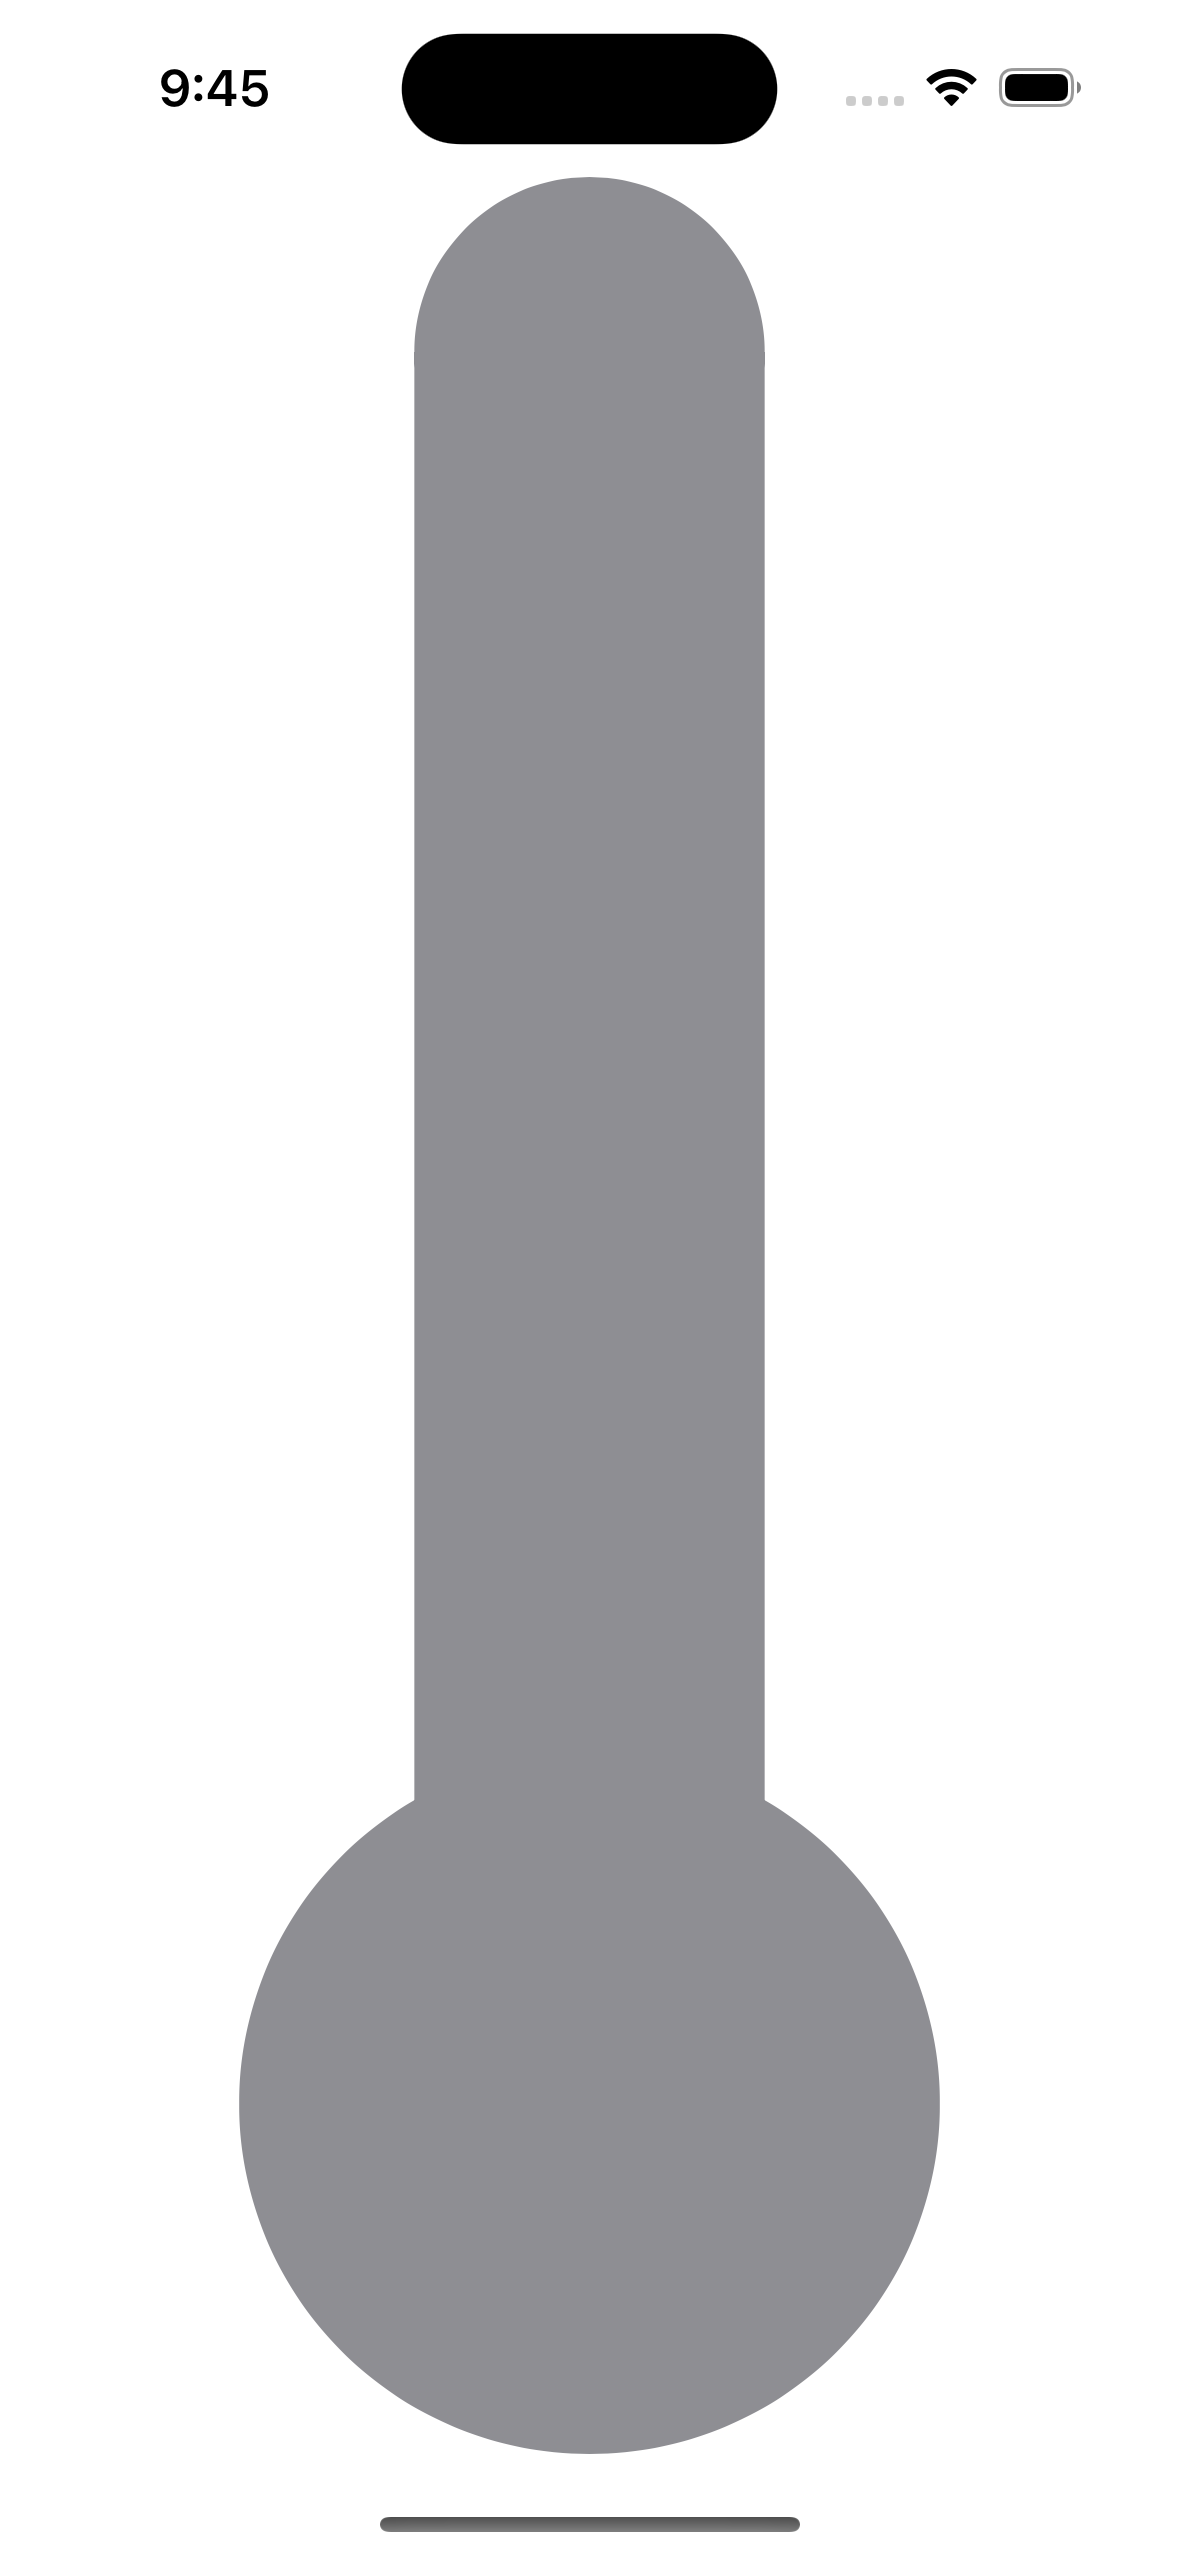
2. 用這個外框在最低層做一個溫度計灰色的底色。
struct ThermometerView : View {
    var body: some View {
        ThermometerShape().foregroundColor(.gray)
    }
}
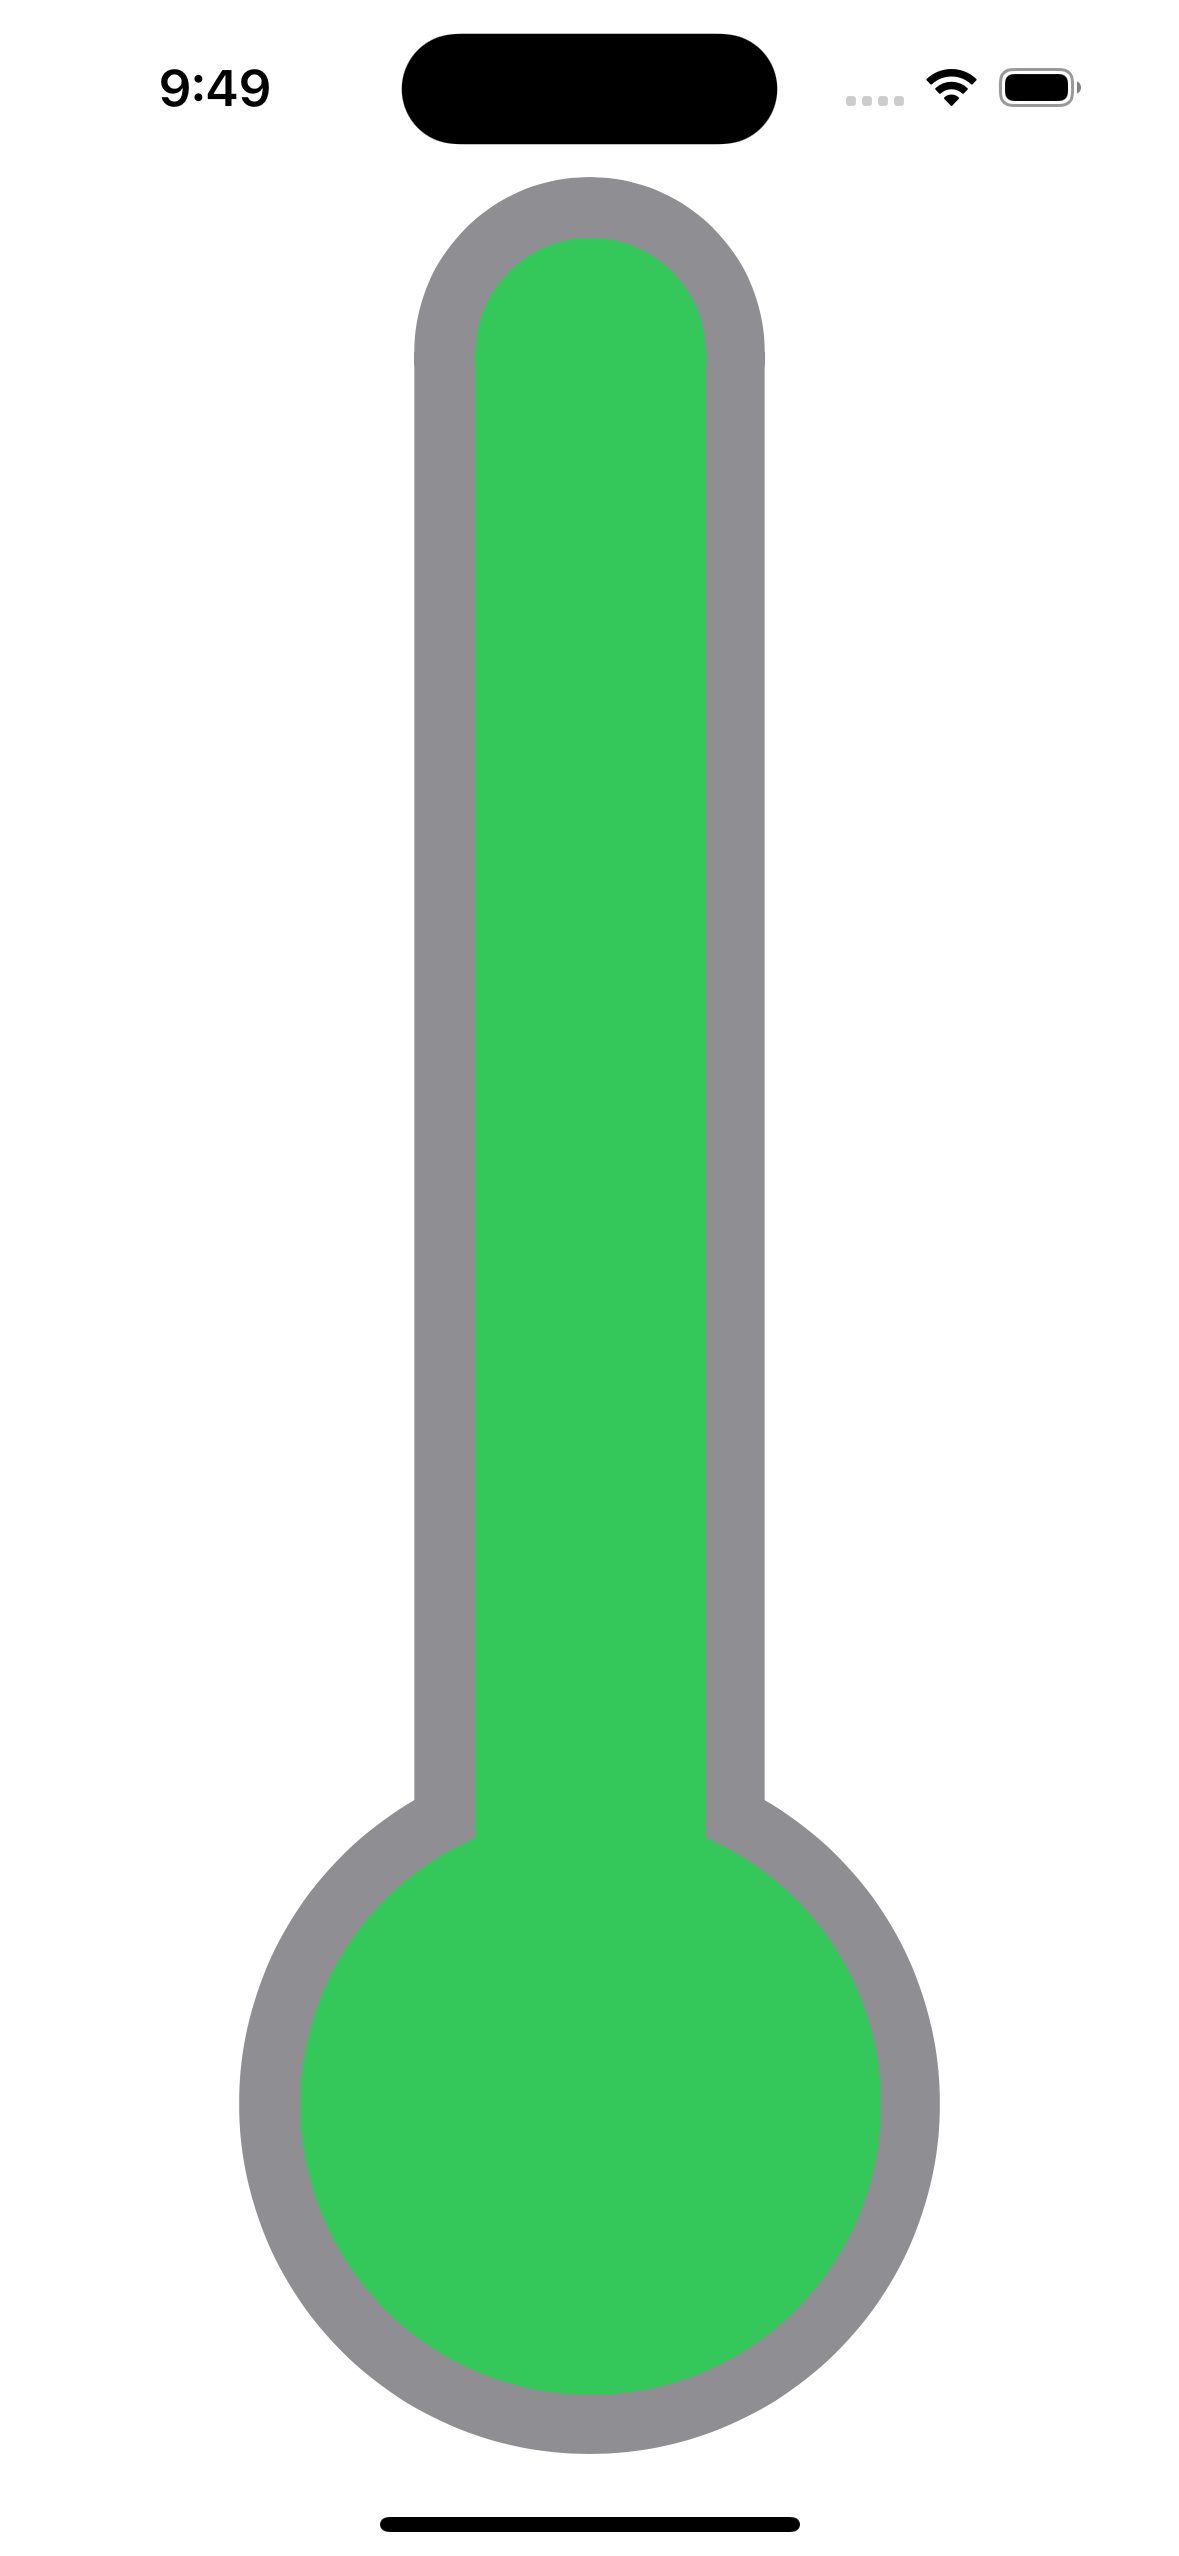
3. 在底色的上層疊加一個指示溫度的溫度層(就像溫度計里的水銀的作用):
struct ThermometerView : View {
    var body: some View {
        ZStack {
            ThermometerShape().foregroundColor(.gray)
            ThermometerShape().inset(by: 20).foregroundColor(.green)
        }
    }
}
4. 我們希望這個溫度層可以因應溫度的高低來拉長或壓低溫度層,可以使用Shape的trim,所以我們畫一個很寛的直線,並用溫度層的來為這條直線做切割,就可以達到這個效果(以下用了一條從下到上寛度為屏幕寛度的綠色長線,所以把原有的底色也擋住了):
struct TrimLine : InsettableShape {
    var insetAmount: CGFloat = 0

    func path(in rect: CGRect) -> Path {
        Path { path in
            path.move(to: CGPoint(x : rect.width/2, y: rect.height))
            path.addLine(to: CGPoint(x : rect.width/2, y: 0))
        }
    }

    func inset(by amount: CGFloat) -> some InsettableShape {
        var arc = self
        arc.insetAmount += amount
        return arc
    }
}
struct ThermometerView : View {
    var body: some View {
        GeometryReader { proxy in
            ZStack {
                ThermometerShape().foregroundColor(.gray)
                TrimLine()
                    .stroke(.green, lineWidth: proxy.size.width)
            }
        }
    }
}

5. 再來就是用Shape的clipShape來把長線切成溫度指示層的形狀:
struct ThermometerView : View {
    var body: some View {
        GeometryReader { proxy in
            ZStack {
                ThermometerShape().foregroundColor(.gray)
                TrimLine()
                    .stroke(.green, lineWidth: proxy.size.width)
                    .clipShape(
                        ThermometerShape()
                            .inset(by: 20)
                    )
            }
        }
    }
}
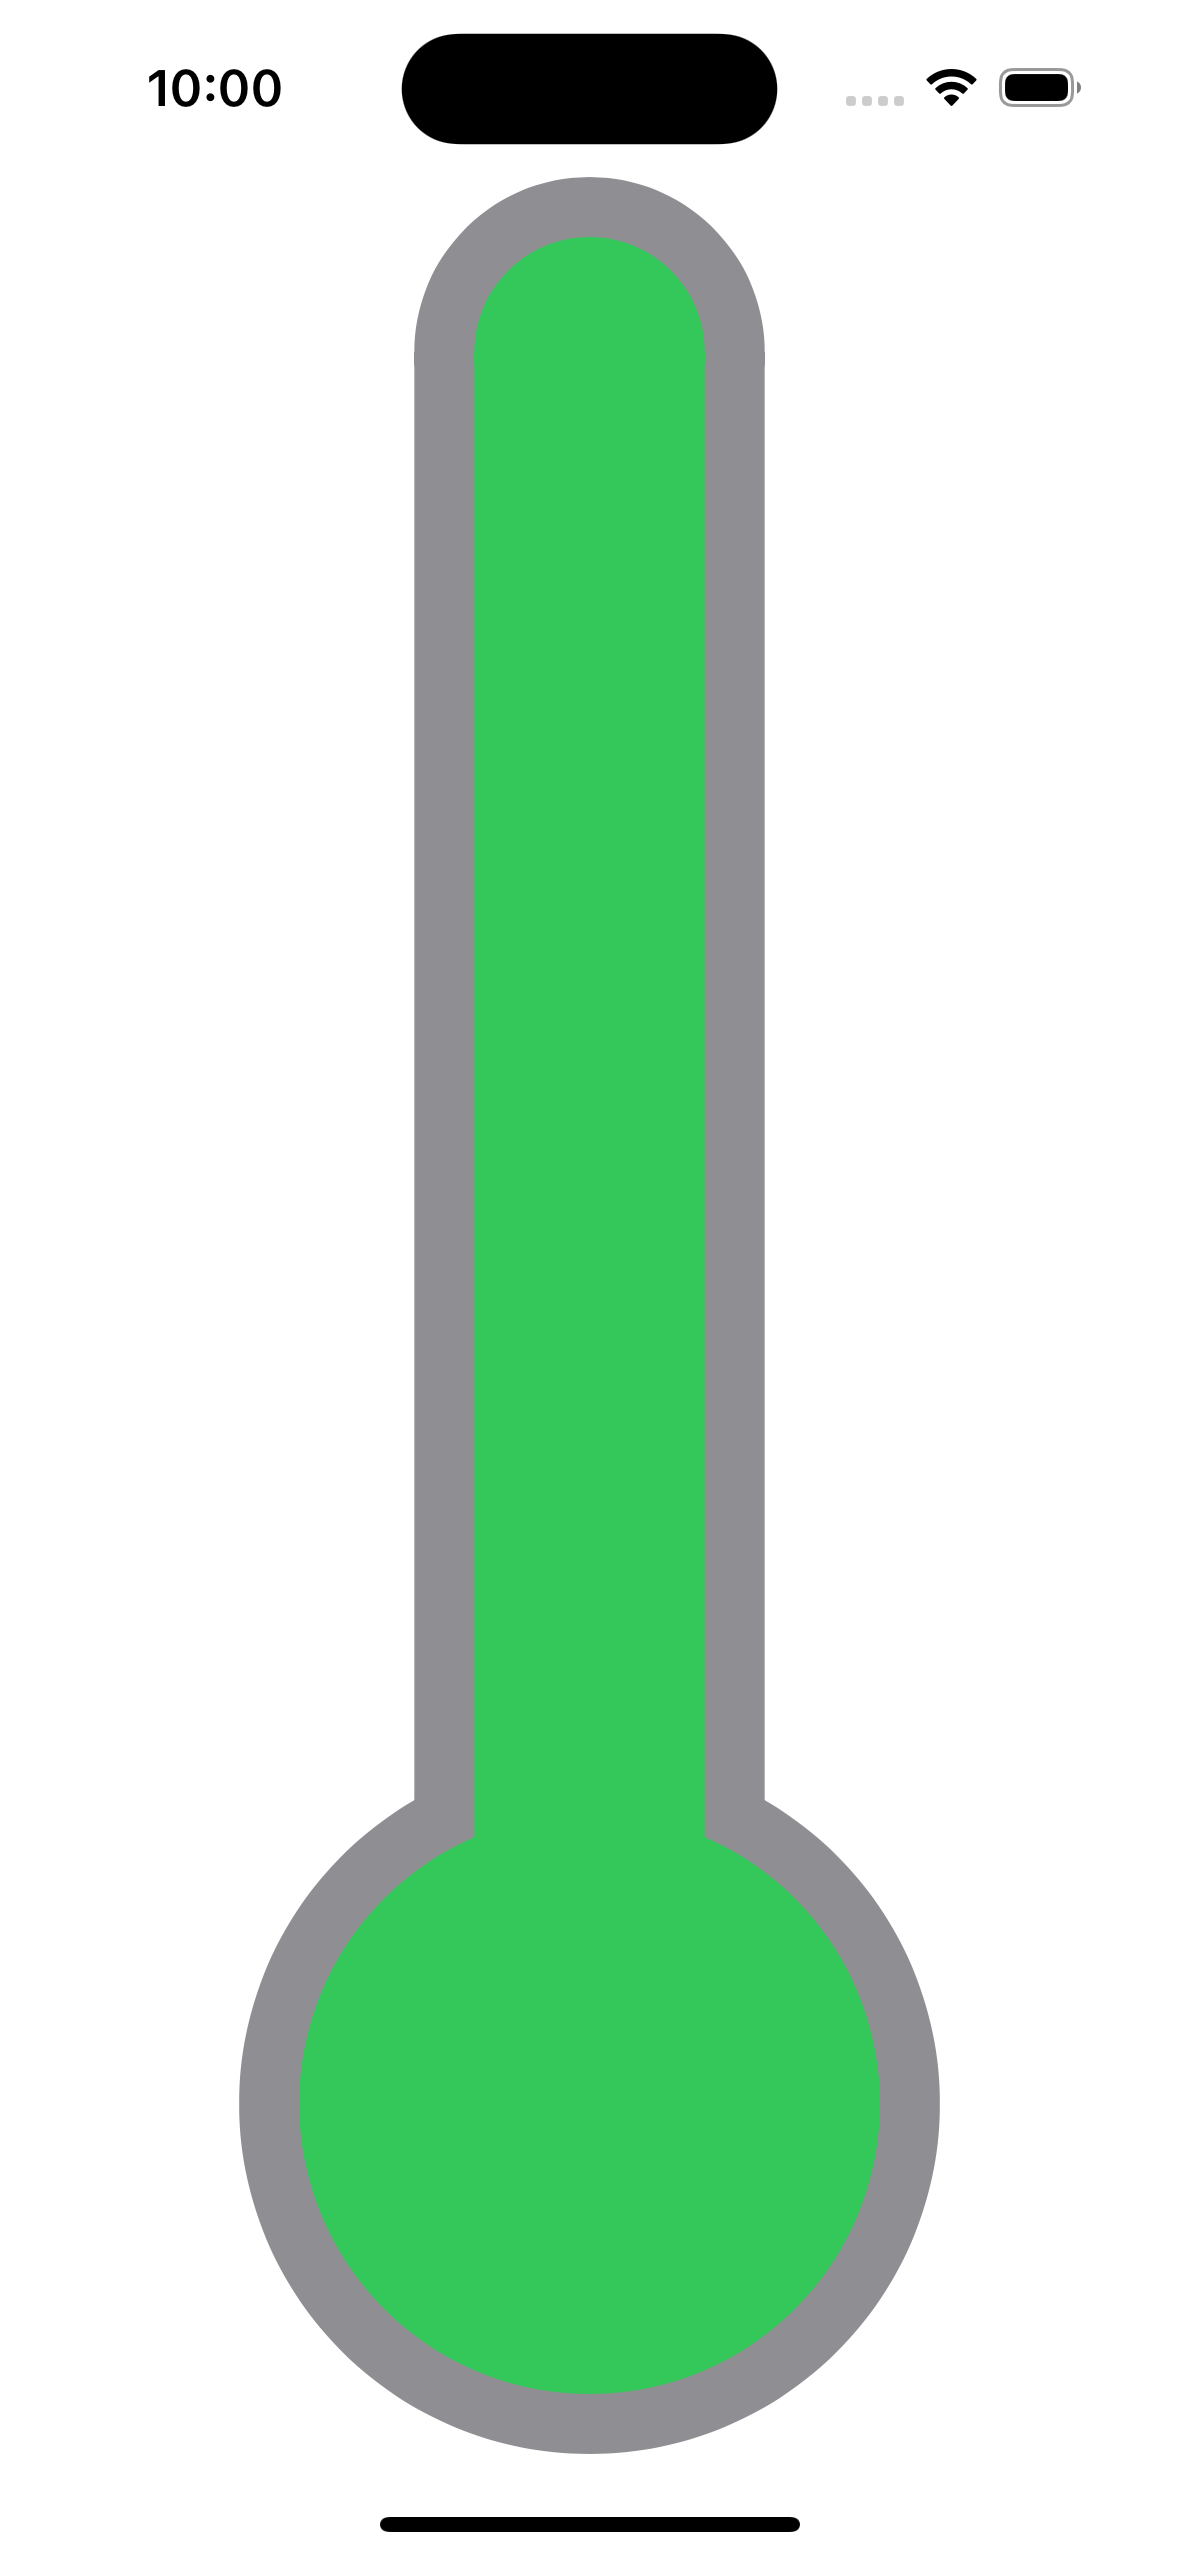
6. 從第5步的效果雖與第3點所作出的效果是一樣,哪為甚麼有這應麻煩呢?神奇的地方就是現在就可以使用trim為控制長綠條,比如只畫一半長度:
struct ThermometerView : View {
    var body: some View {
        GeometryReader { proxy in
            ZStack {
                ThermometerShape().foregroundColor(.gray)
                TrimLine()
                    .trim(from: 0.0, to: 0.5)
                    .stroke(.green, lineWidth: proxy.size.width)
                    .clipShape(
                        ThermometerShape()
                            .inset(by: 20)
                    )
            }
        }
    }
}
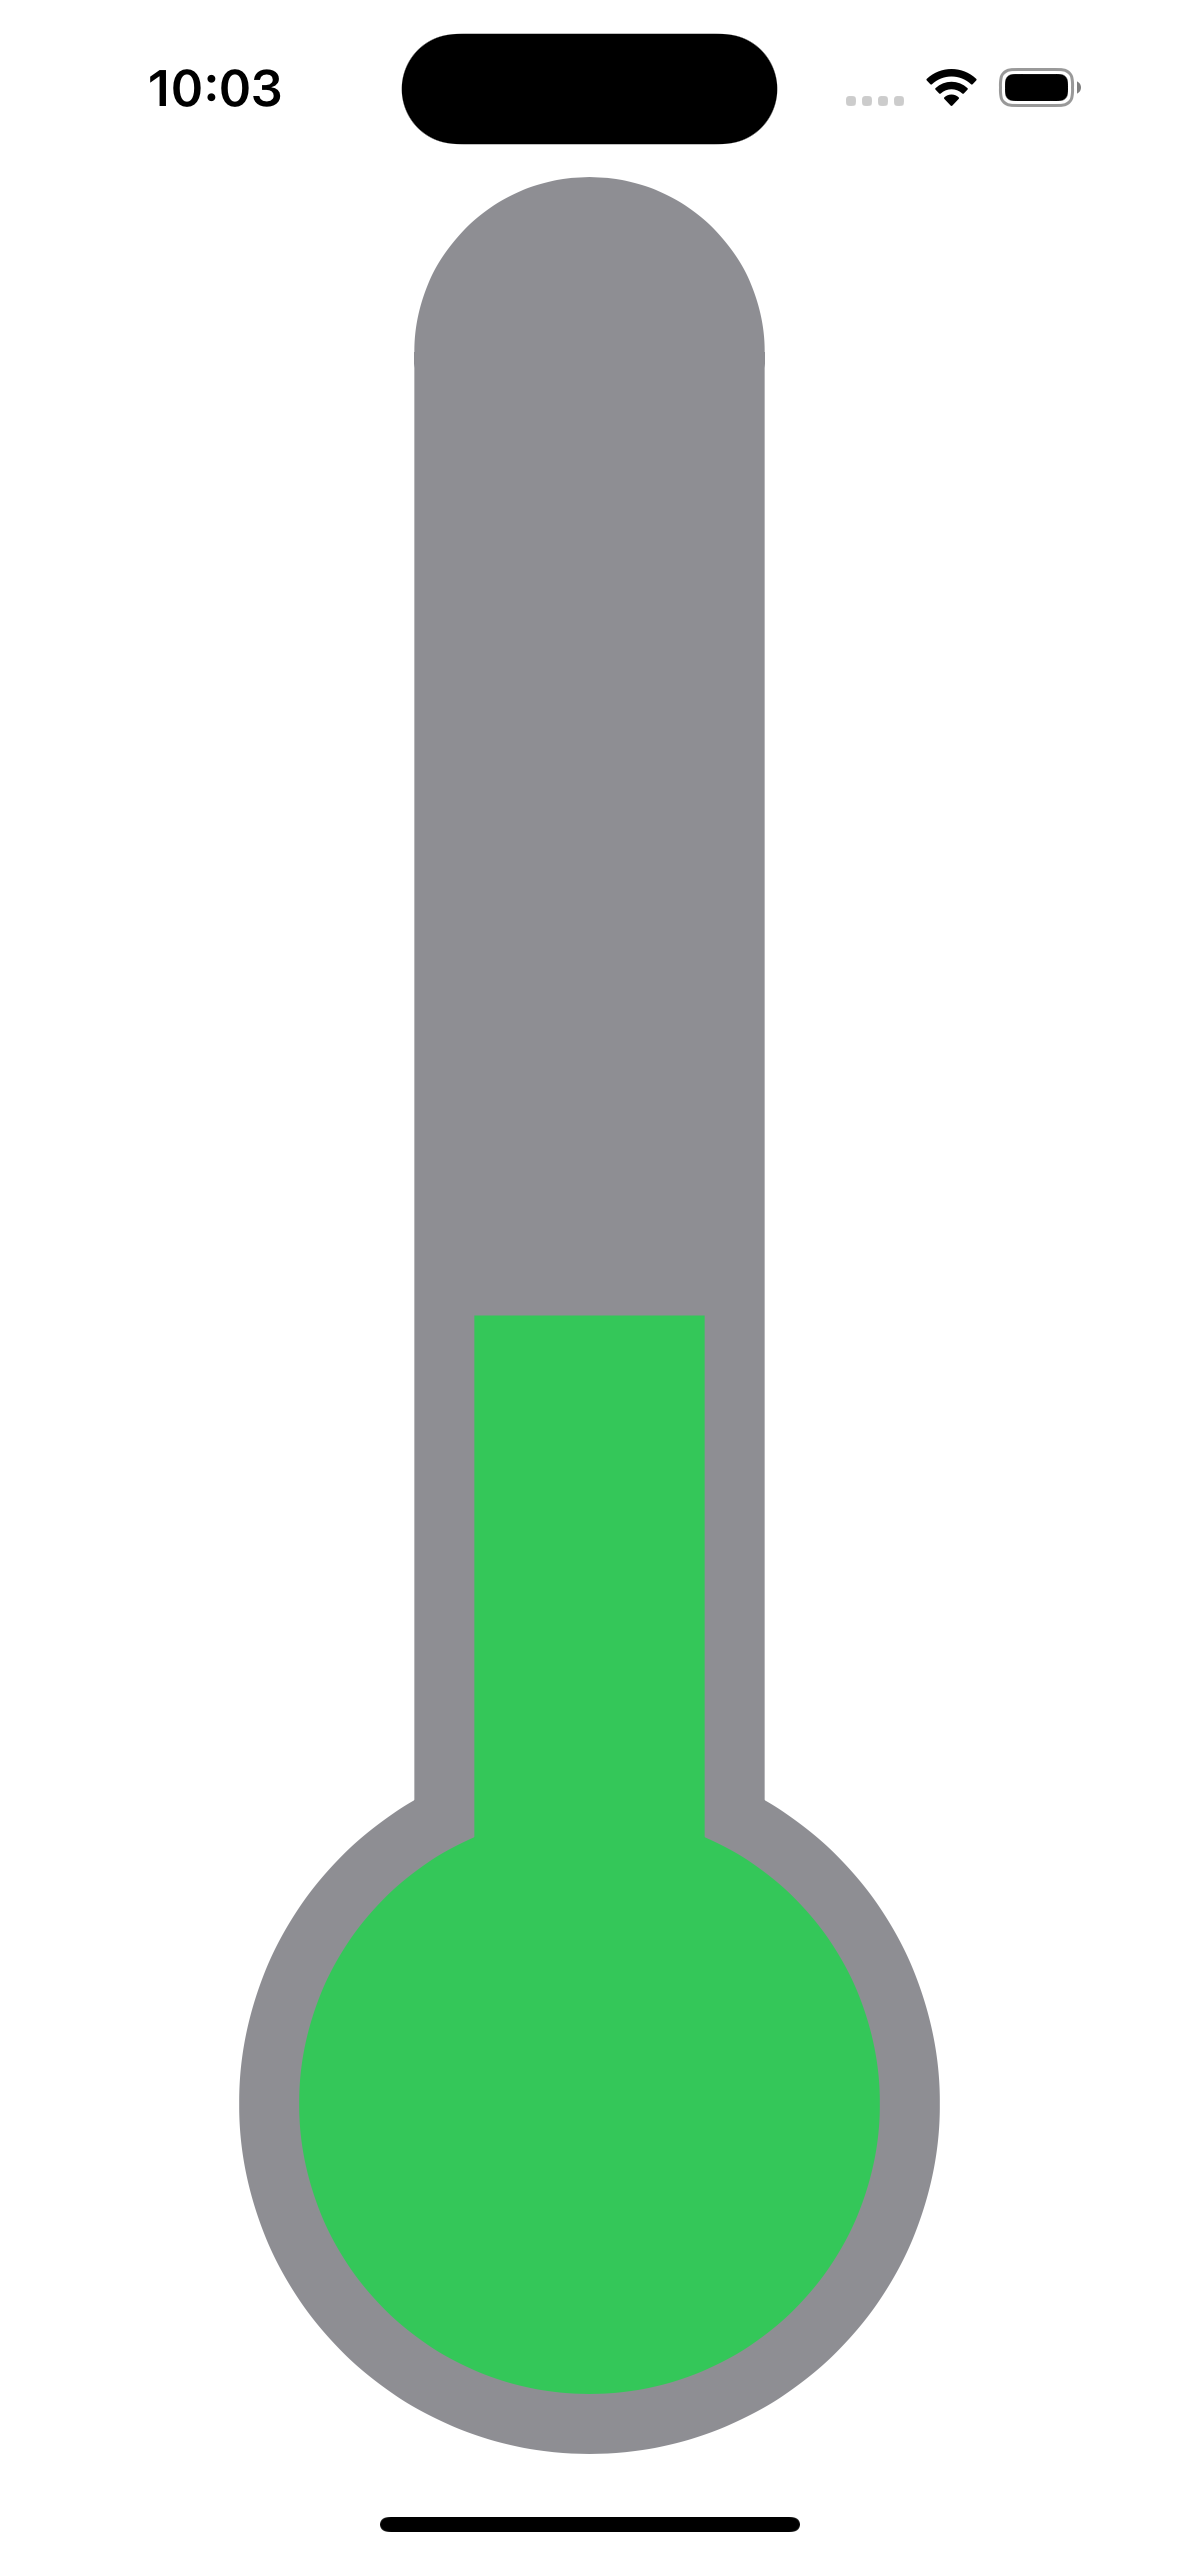
7. 然後使用DragGesture來控件溫度的高底:
struct ThermometerView : View {
    @State var current = 0.5
    @State var delta = 0.0
    var body: some View {

        GeometryReader { proxy in
            let dragGesture = DragGesture()
                .onChanged({ value in
                    delta = value.translation.height/proxy.size.height
                })
                .onEnded({ value in
                    current = max(0, min(1, current - delta))
                    delta = 0.0
                })

            ZStack {
                ThermometerShape().foregroundColor(.gray)
                TrimLine()
                    .trim(from: 0.0, to: current - delta)
                    .stroke(.green, lineWidth: proxy.size.width)
                    .clipShape(
                        ThermometerShape()
                            .inset(by: 20)
                    )
            }.gesture(dragGesture)
        }
    }
}
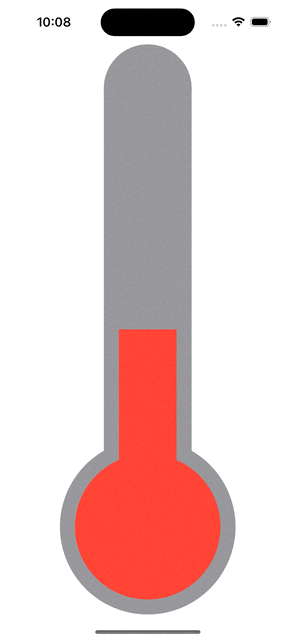
8. 還可以在因應不同的溫度顯示不同的顏色:
struct ThermometerView : View {
    @State var current = 0.5
    @State var delta = 0.0
    var body: some View {

        GeometryReader { proxy in
            let dragGesture = DragGesture()
                .onChanged({ value in
                    delta = value.translation.height/proxy.size.height
                })
                .onEnded({ value in
                    current = max(0, min(1, current - delta))
                    delta = 0.0
                })

            ZStack {
                ThermometerShape().foregroundColor(.gray)
                TrimLine()
                    .trim(from: 0.0, to: current - delta)
                    .stroke(current - delta >= 0.3 ? .red : .green, lineWidth: proxy.size.width)
                    .clipShape(
                        ThermometerShape()
                            .inset(by: 20)
                    )
            }.gesture(dragGesture)
        }
    }
}
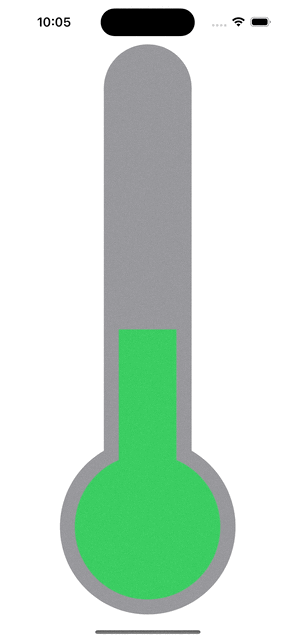
9. 最後把這個View打包成一個SwiftUI控件Thermometer,就可以重覆的使用:
struct Thermometer : View {
    @State var current = 0.5
    @State var delta = 0.0
    var body: some View {

        GeometryReader { proxy in
            let dragGesture = DragGesture()
                .onChanged({ value in
                    delta = value.translation.height/proxy.size.height
                })
                .onEnded({ value in
                    current = max(0, min(1, current - delta))
                    delta = 0.0
                })

            ZStack {
                ThermometerShape().foregroundColor(.gray)
                TrimLine()
                    .trim(from: 0.0, to: current - delta)
                    .stroke(current - delta >= 0.3 ? .red : .green, lineWidth: proxy.size.width)
                    .clipShape(
                        ThermometerShape()
                            .inset(by: 10)
                    )
            }.gesture(dragGesture)
        }
    }
}

struct ThermometerView : View {
    var body: some View {
        VStack {
            Thermometer()
            Thermometer()
        }
    }
}