SwiftUI 學習在VStack使用alignmentGuide
xcode 13.4.1, swift 5.5, iOS 15.4
2022-09-01
SwiftUI 提供了不同的佈局元件,已經基本滿足大部份App的佈局需要,但如何結合SwiftUI的alignmentGuide可以做出更多的佈局變化。
SwiftUI HStack佈局
SwiftUI VStack佈局
SwiftUI ZStack佈局
SwiftUI HStack佈局
SwiftUI VStack佈局
SwiftUI ZStack佈局
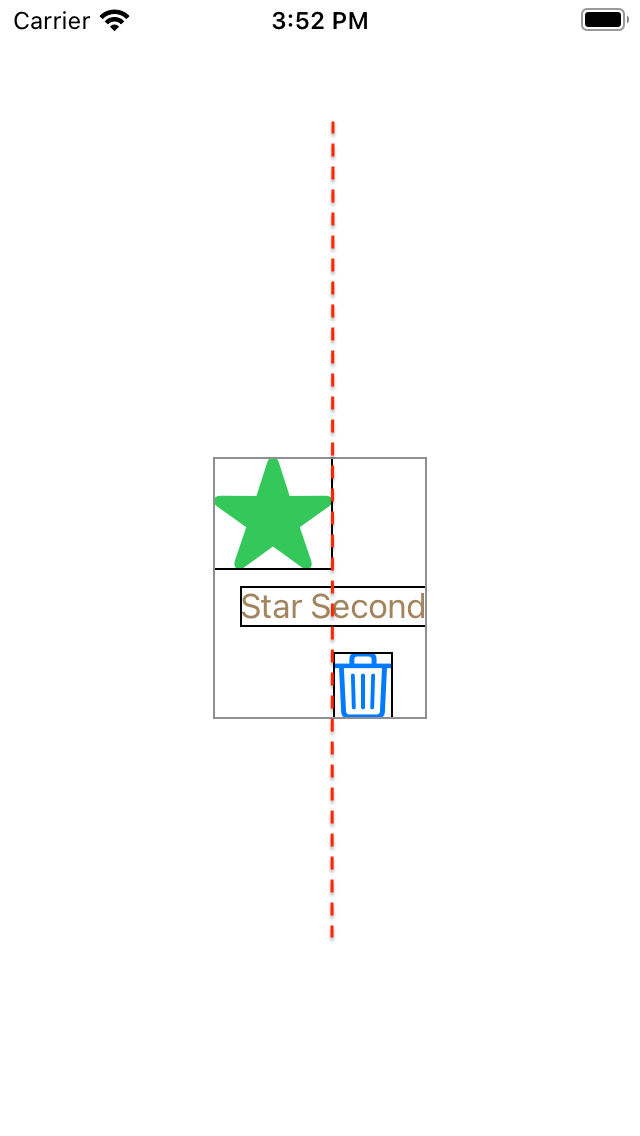
1. 先使用VStack來做一個向左邊對齊的佈局。
import SwiftUI

struct AlignmentGuideExample: View {
    var body: some View {
        VStack(alignment: .leading) {
            Image(systemName: "star.fill")
                .resizable()
                .scaledToFit()
                .frame(width: 60)
                .border(.black)
                .foregroundColor(.green)
            Text("Star Second")
                .border(.black)
                .foregroundColor(.brown)
            Image(systemName: "trash")
                .resizable()
                .scaledToFit()
                .frame(width: 30)
                .border(.black)
                .foregroundColor(.blue)
        }
        .border(.gray)
    }
}
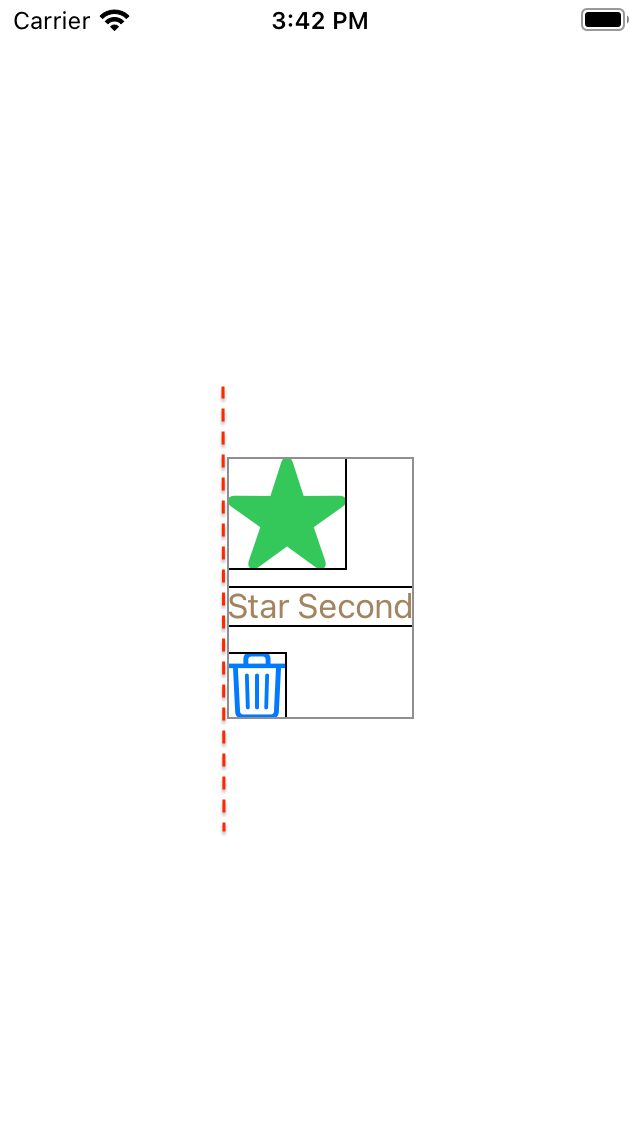
2. 有時可能不是每個子元件都是同一個對齊方式,這時就可以用alignmentGuide來作修改,以下修改為用Tash Image最右邊與其他元件的最左邊對齊,實作及效果如下:
import SwiftUI

struct AlignmentGuideExample: View {
    var body: some View {
        VStack(alignment: .leading) {
            Image(systemName: "star.fill")
                .resizable()
                .scaledToFit()
                .frame(width: 60)
                .border(.black)
                .foregroundColor(.green)
            Text("Star Second")
                .border(.black)
                .foregroundColor(.brown)
            Image(systemName: "trash")
                .resizable()
                .scaledToFit()
                .frame(width: 30)
                .border(.black)
                .foregroundColor(.blue)
                .alignmentGuide(.leading) { dimension in
                    dimension[.trailing]
                }
        }
        .border(.gray)
    }
}
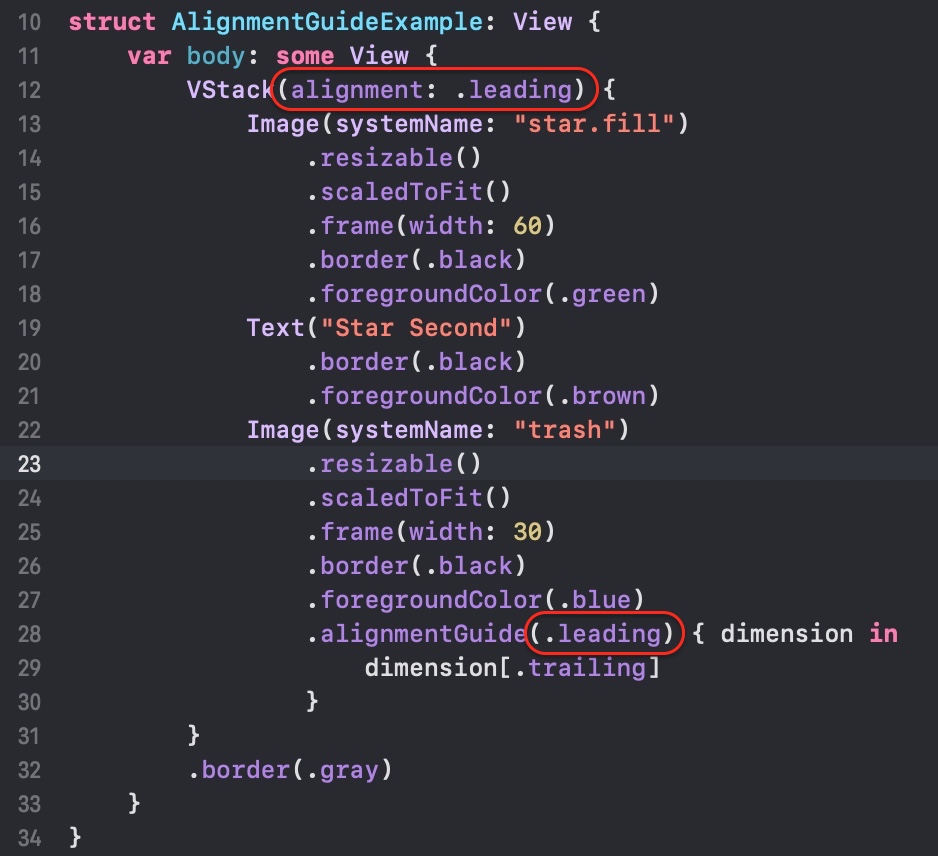
alignmentGuide(_:computeValue:)的第一個參數是對齊方式,這個對齊方式要與最近父佈局元件的對齊方式要一樣(如下圖所示,在紅色圓圈的對齊方式都是.leading),才會使用第二個參數computeValue closure所計算的內容,不然就不會起作用。
3. 若將trash image的對齊方式改成.trailing,與VStack的對齊方式不一致,computeValue closure就不會被執行,只會用VStack的所設置的對齊方式。
import SwiftUI

struct AlignmentGuideExample: View {
    var body: some View {
        VStack(alignment: .leading) {
            Image(systemName: "star.fill")
                .resizable()
                .scaledToFit()
                .frame(width: 60)
                .border(.black)
                .foregroundColor(.green)
            Text("Star Second")
                .border(.black)
                .foregroundColor(.brown)
            Image(systemName: "trash")
                .resizable()
                .scaledToFit()
                .frame(width: 30)
                .border(.black)
                .foregroundColor(.blue)
                .alignmentGuide(.trailing) { dimension in
                    dimension[.trailing]
                }
        }
        .border(.gray)
    }
}

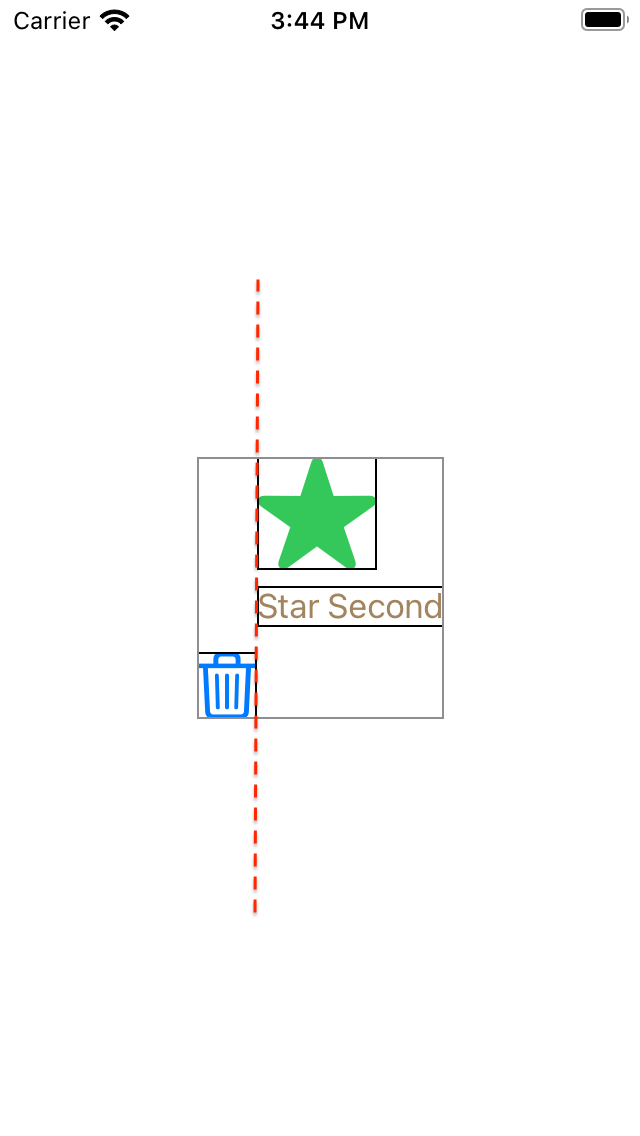
4. 理解了alignmentGuid的使用,以下試試把左邊的star image設置成以.trailing為對齊,中間的text使用VStack的默認對齊(.center),右邊的trash image設置為以.leading對齊,實作與效果如下:
import SwiftUI

struct AlignmentGuideExample: View {
    var body: some View {
        VStack(alignment: .center) {
            Image(systemName: "star.fill")
                .resizable()
                .scaledToFit()
                .frame(width: 60)
                .border(.black)
                .foregroundColor(.green)
                .alignmentGuide(HorizontalAlignment.center) { dimension in
                    dimension[.trailing]
                }
            Text("Star Second")
                .border(.black)
                .foregroundColor(.brown)
            Image(systemName: "trash")
                .resizable()
                .scaledToFit()
                .frame(width: 30)
                .border(.black)
                .foregroundColor(.blue)
                .alignmentGuide(HorizontalAlignment.center) { dimension in
                    dimension[.leading]
                }
        }
        .border(.gray)
    }
}

