SwiftUI 客制化ViewModifier
xcode 13.4.1, swift 5.5, iOS 15.4
2022-08-30
SwiftUI 提供了大量建的modifiers,像font,background,clipShape等等,但有時為了設計或為了加速團隊開發速度,也有可能客制化自己的ViewModifier。

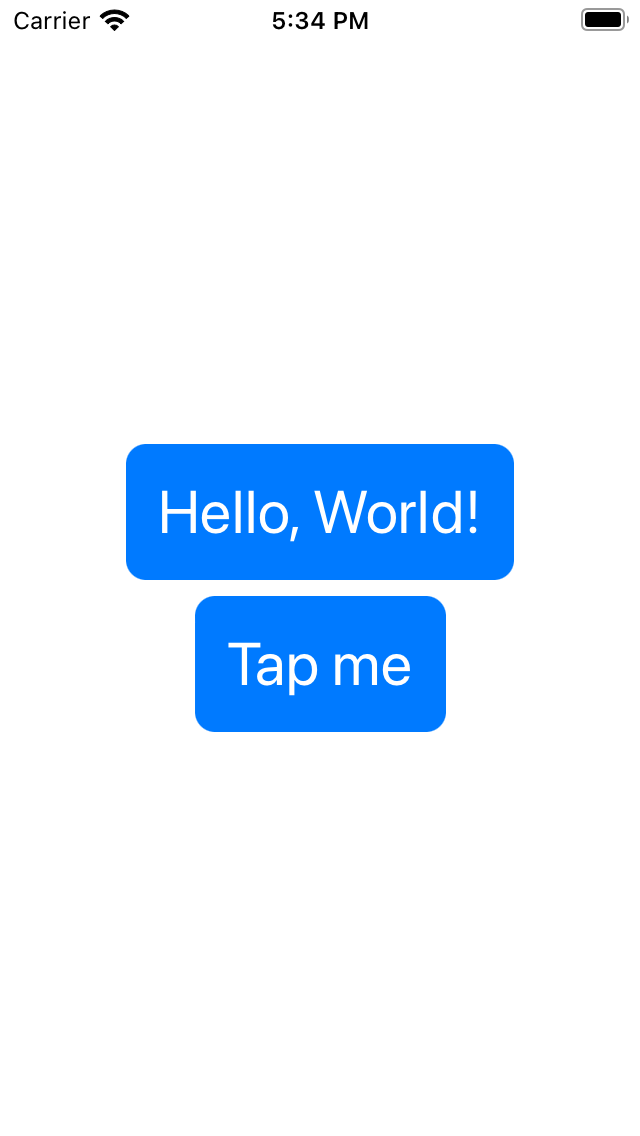
1. 假設以下的頁面,有一個Text和Button都需要相同的樣式,實作如下:
import SwiftUI

struct ViewModifierExample: View {
    var body: some View {
        Text("Hello, World!")
            .font(.largeTitle)
            .foregroundColor(.white)
            .padding()
            .background(.blue)
            .clipShape(RoundedRectangle(cornerRadius: 10))

        Button("Tap me") {}
            .font(.largeTitle)
            .foregroundColor(.white)
            .padding()
            .background(.blue)
            .clipShape(RoundedRectangle(cornerRadius: 10))
    }
}

2. 要客制化自己的modifier,可以創建自己的符合ViewModifier protocol的struct,實作如下把共用的ViewModifier包裝到MyViewModifier中,並在Text和Button使用modifier來使用該MyViewModifier,可以看到主要程式簡潔了很多:
import SwiftUI

struct ViewModifierExample: View {
    var body: some View {
        Text("Hello, World!")
            .modifier(MyViewModifier())

        Button("Tap me") {}
            .modifier(MyViewModifier())
    }
}

struct MyViewModifier : ViewModifier {
    func body(content: Content) -> some View {
        content
            .font(.largeTitle)
            .foregroundColor(.white)
            .padding()
            .background(.blue)
            .clipShape(RoundedRectangle(cornerRadius: 10))
    }
}

3. 為了像內建font,background,clipShape那樣來使用,可以把該modifier擴展到View中,實作如下:
import SwiftUI

struct ViewModifierExample: View {
    var body: some View {
        Text("Hello, World!")
            .myViewModifier()

        Button("Tap me") {}
            .myViewModifier()
    }
}

extension View {
    func myViewModifier() -> some View {
        modifier(MyViewModifier())
    }
}

struct MyViewModifier : ViewModifier {
    func body(content: Content) -> some View {
        content
            .font(.largeTitle)
            .foregroundColor(.white)
            .padding()
            .background(.blue)
            .clipShape(RoundedRectangle(cornerRadius: 10))
    }
}

4. 再來試試用客制化ViewModifier把圖片的名稱加到圖片中,以下是圖片的列表:
import SwiftUI

struct ViewModifierExample: View {
    let cats : [String] = ["cat1", "cat2", "cat3", "cat4", "cat5", "cat6"]
    var body: some View {
        ScrollView {
            VStack {
                ForEach(cats, id:\.self) { name in
                    Image(name)
                        .resizable()
                        .scaledToFit()
                }
            }
        }
    }
}

5.然後客制化Watermark為每張圖片的右下角加名字:
import SwiftUI

struct ViewModifierExample: View {
    let cats : [String] = ["cat1", "cat2", "cat3", "cat4", "cat5", "cat6"]
    var body: some View {
        ScrollView {
            VStack {
                ForEach(cats, id:\.self) { name in
                    Image(name)
                        .resizable()
                        .scaledToFit()
                        .watermarked(with: name)
                }
            }
        }
    }
}

struct Watermark: ViewModifier {
    var text: String

    func body(content: Content) -> some View {
        ZStack(alignment: .bottomTrailing) {
            content
            Text(text)
                .font(.largeTitle)
                .foregroundColor(.white)
                .background(.gray.opacity(0.5))
                .rotationEffect(.degrees(-45))
                .offset(x: -20, y: -20)
        }
    }
}

extension View {
    func watermarked(with text: String) -> some View {
        modifier(Watermark(text: text))
    }
}


