SwiftUI 為創建Button客制化buttonStyle
xcode 13.4.1, swift 5.5, iOS 15.4
2022-08-29
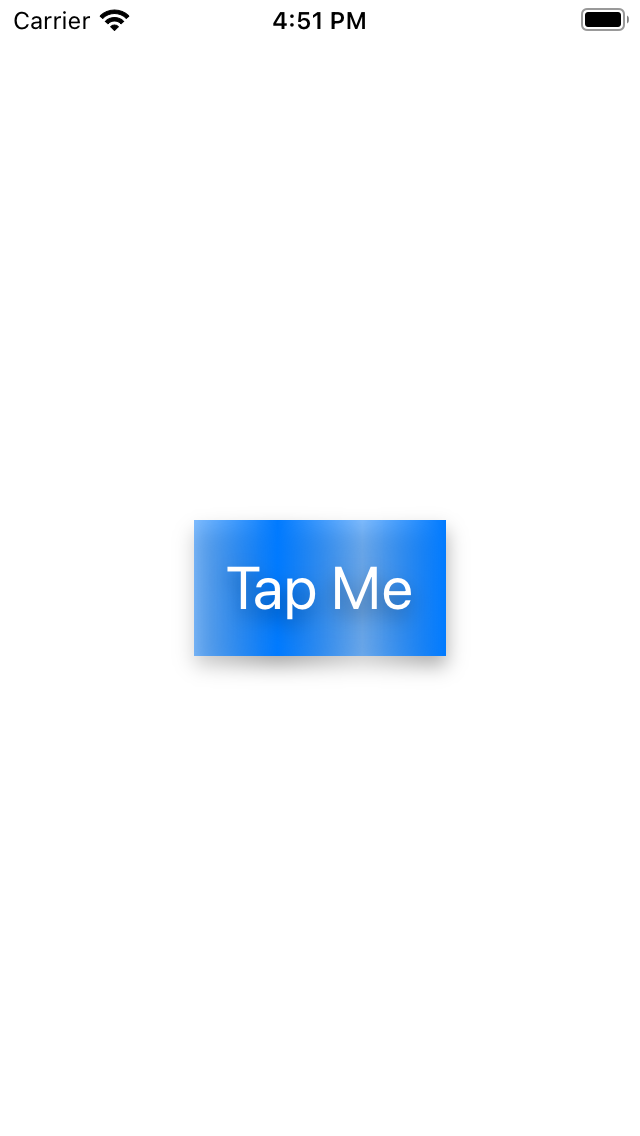
SwiftUI 其實已經為Button預先做了幾個顯示樣式,應付大部份App的要求也已經很足夠,但有時我們也需要應因個別App的設計,內建的ButtonStyle不足夠我們自己,這時可以把客制化的Button樣式用ButtonStyle來進行打包,以便進行重用。

1. 先做一個有一定樣式的Button。
import SwiftUI

struct ButtonExample: View {
    var body: some View {
        Button {} label: {
            Text("Tap Me")
                .padding()
                .foregroundColor(.white)
                .font(.largeTitle)
                .background(
                    LinearGradient(gradient: Gradient(colors:[ .blue.opacity(0.5), .blue, .blue.opacity(0.5), .blue]), startPoint: .leading, endPoint: .trailing)
                )
                .shadow(color: Color.black.opacity(0.35), radius: 5, x: 0, y: 5)
        }

    }
}

2. 然後這樣式用ButtonStyle來做包裝,並在Button使用buttonStyle的方法來設置,實現如下:
import SwiftUI

struct ButtonExample : View {
    var body: some View {
        Button("Tap Me") {}
            .buttonStyle(BlueButtonStyle())

    }
}

struct BlueButtonStyle : ButtonStyle {
    func makeBody(configuration: Configuration) -> some View {
        configuration.label
            .padding()
            .foregroundColor(.white)
            .font(.largeTitle)
            .background(
                LinearGradient(gradient: Gradient(colors:[ .blue.opacity(0.5), .blue, .blue.opacity(0.5), .blue]), startPoint: .leading, endPoint: .trailing)
            )
            .shadow(color: Color.black.opacity(0.35), radius: 5, x: 0, y: 5)
    }
}

3. 另外也可以把BlueButtonStyle放到擴展的ButtonStyle,讓使用時更容易,實現如下:
import SwiftUI

struct ButtonExample : View {
    var body: some View {
        Button("Tap Me") {}
            .buttonStyle(.blueButtonStyle)

    }
}

struct BlueButtonStyle : ButtonStyle {
    func makeBody(configuration: Configuration) -> some View {
        configuration.label
            .padding()
            .foregroundColor(.white)
            .font(.largeTitle)
            .background(
                LinearGradient(gradient: Gradient(colors:[ .blue.opacity(0.5), .blue, .blue.opacity(0.5), .blue]), startPoint: .leading, endPoint: .trailing)
            )
            .shadow(color: Color.black.opacity(0.35), radius: 5, x: 0, y: 5)
    }
}

extension ButtonStyle where Self == BlueButtonStyle {
  static var blueButtonStyle: BlueButtonStyle { .init() }
}


